
Roses. Just the word conjures up images of soft petals, rich colors, and that utterly unmistakable, sweet scent. For a long time, I thought growing roses was some kind of arcane art, reserved only for seasoned gardeners with green thumbs blessed by nature itself. I mean, they look so delicate, right? Surely, they must be incredibly difficult to keep happy.
Honestly, that couldn’t be further from the truth. While they do appreciate a bit of attention, growing roses isn’t nearly as complicated as it seems. In fact, with a few straightforward steps and a bit of love, you can absolutely have a garden bursting with these iconic flowers. You just need to know what they like, and how to give it to them.
Key Takeaways
Choosing the Right Rose for Your Garden

Consider your climate. Some roses are hardier than others. Ask your local nursery staff which varieties do best in your specific region. They’re usually full of excellent advice, and they know the local conditions best. Also, think about the space you have. Are you looking for a compact shrub, a climbing showstopper, or something in between?
Here are some popular types you might encounter:
- Hybrid Teas: These are what most people picture when they think of a rose – long stems, classic elegant blooms, often fragrant. Great for cutting and bringing indoors.
- Floribundas: They produce clusters of smaller flowers, giving a bushier, more colorful display. They’re often easier to care for than Hybrid Teas.
- Grandifloras: A mix between Hybrid Teas and Floribundas, offering large blooms in clusters.
- Shrub Roses: A broad category including many modern, hardy varieties like English Roses (bred by David Austin). They tend to be disease-resistant and produce many blooms.
- Climbing Roses: Perfect for training on trellises, arbors, or walls, offering vertical beauty. They have long, flexible canes.
- Miniature Roses: Tiny versions of larger roses, perfect for containers, small gardens, or even indoors.
Don’t be afraid to pick a rose that speaks to you. Just make sure it’s got a good chance of being happy in its new home. If you’re a beginner, I always tell people to start with a shrub rose or a floribunda because they tend to be more forgiving.
Sunlight and Soil: Setting Up the Perfect Spot
Roses need at least six hours of direct sunlight every single day. Eight hours is even better! Think about your garden throughout the day. Where does the sun hit strongest and longest? That’s your spot. Without enough sun, you’ll get fewer flowers, weaker growth, and your plant will be more prone to problems. Trust me, I learned this the hard way with my first climbing rose. I put it on a beautiful north-facing wall, thinking it would look lovely, and it just sulked for a year before I finally moved it. It made a huge difference!
Now, let’s talk dirt. Roses aren’t super picky, but they do have preferences. They absolutely love rich, well-draining soil. What does “well-draining” mean? It means water shouldn’t sit around their roots and make things soggy. If your soil is heavy clay, you’ll want to mix in a good amount of organic matter like compost or aged manure. This helps break up the clay and improve drainage.
If you have sandy soil, the same advice applies: add compost! It’ll help your sandy soil hold onto precious water and nutrients. The ideal soil pH for roses is slightly acidic, somewhere between 6.0 and 6.5. A simple soil test kit from your garden center can help you figure out your current pH and guide you on any adjustments needed.
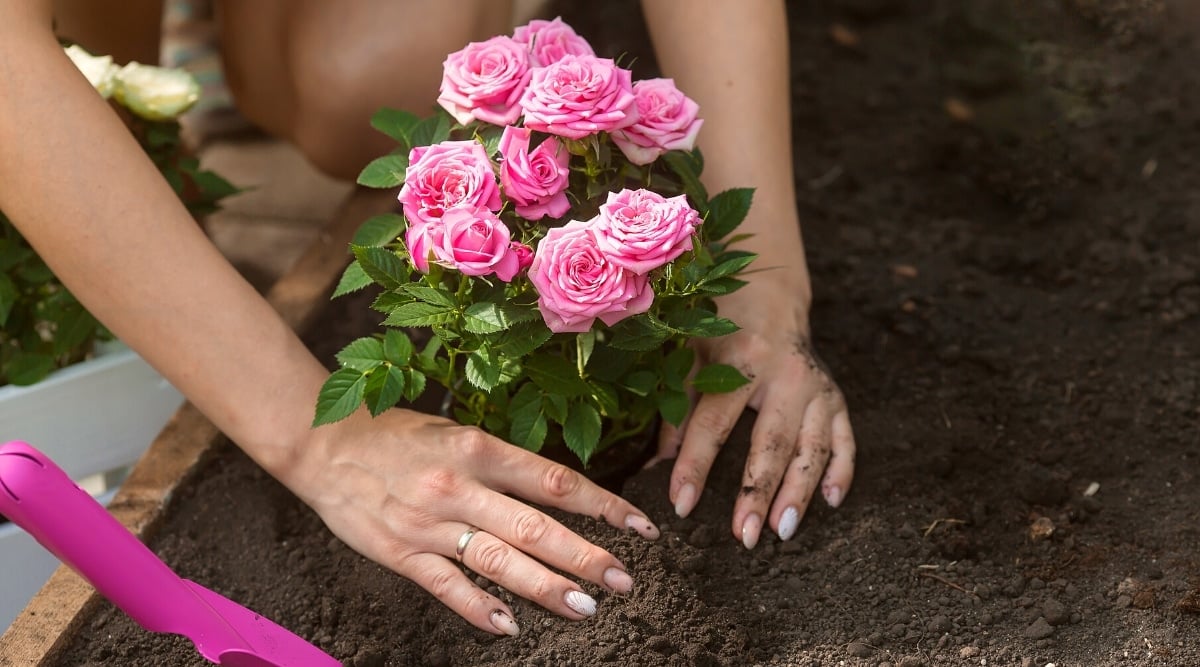
Planting Your Rose Bush Like a Pro
:max_bytes(150000):strip_icc()/how-to-plant-roses-1403055_FINAL-2-5c47621c46e0fb0001b8184b.png)
For bare-root roses (these look like a bunch of sticks with roots, usually bought in late winter/early spring), you’ll want to soak the roots in a bucket of water for a few hours before planting. This helps them rehydrate.
Here’s the rundown for both types:
- Dig a generous hole: Make it wide enough for the roots to spread out comfortably and deep enough so that the graft union (the knobby part where the rose was joined to its rootstock) sits just above the soil line in colder climates, or at the soil line in warmer areas.
- Mound the soil: Create a small cone of soil in the center of the hole. This helps support the roots.
- Position your rose: Carefully place the rose on top of the mound, spreading the roots out evenly.
- Backfill and water: Gently fill the hole with your amended soil, patting it down lightly to remove air pockets. Water deeply as you go, then water again thoroughly once the hole is completely filled.
- Mulch: Add a two-inch layer of organic mulch (like wood chips or shredded leaves) around the base. Keep it a few inches away from the stem to prevent rot.
The first time I planted a bare-root rose, I was so focused on getting it straight that I didn’t spread the roots out enough. It took a while for it to really take off. Now, I always make sure those roots have plenty of room to stretch. A well-planted rose has a strong foundation, leading to a much healthier plant down the road.
Pro Tip: When planting a container rose, gently remove it from its pot and loosen any circling roots at the bottom. This encourages them to reach out into the new soil.
Watering Wisdom: Keeping Your Roses Hydrated
Roses prefer deep, infrequent watering rather than light, daily sprinkles. You want the water to soak down into the root zone, encouraging the roots to grow deep and strong. How much is enough? A good rule of thumb is about one to two gallons of water per week for each mature rose bush, sometimes more in very hot, dry weather.
The best time to water is in the morning. This gives the leaves plenty of time to dry out before evening. Wet leaves overnight can invite fungal diseases, which nobody wants. Aim the water at the base of the plant, directly onto the soil, rather than spraying the foliage. A soaker hose or drip irrigation system works wonders for this, delivering water directly where it’s needed and saving you time.
How do you know if your rose needs water? Stick your finger about two inches into the soil near the base of the plant. If it feels dry, it’s time to water. If it’s still damp, hold off. Overwatering can be just as harmful as underwatering, leading to root rot. It’s all about finding that sweet spot.
Feeding Your Flowers: Nutrition for Glorious Blooms

You’ll find many fertilizers specifically formulated for roses, often labeled “rose food.” These usually have a balanced blend of nitrogen (for leafy growth), phosphorus (for roots and flowers), and potassium (for overall plant health). Look for something with a slightly higher middle number (phosphorus) to really boost those blossoms.
When should you feed them? Start in early spring when new growth begins. Continue feeding every four to six weeks throughout the growing season, usually stopping about eight weeks before your first expected frost. This gives the plant time to harden off for winter rather than putting all its energy into new, tender growth that could be damaged by the cold.
Remember to always follow the instructions on the fertilizer package carefully. More isn’t always better, and too much fertilizer can burn the roots. Always water your roses thoroughly before and after applying granular fertilizer; this helps prevent root burn and moves the nutrients down into the soil where the roots can access them.
Pruning for Perfection: Shaping Your Rose Bushes

The main pruning event usually happens in late winter or early spring, just as the buds start to swell. This is when you’ll do the most significant shaping and clean-up.
Here’s what you’re generally aiming to do:
- Remove dead, damaged, or diseased wood: These are easy to spot. Dead wood is brittle and brown. Diseased wood might look discolored or shriveled. Always cut back to healthy wood.
- Eliminate crossing branches: Branches rubbing against each other can create wounds, opening the door for pests and diseases. Choose the stronger, better-positioned branch and remove the other.
- Open up the center: You want good air flow. Remove any branches growing inwards towards the center of the plant. This helps prevent fungal issues.
- Cut back old canes: For established bushes, remove some of the oldest, thickest canes right down to the ground. This encourages fresh, vigorous new growth from the base.
- Shape the plant: Aim for an attractive, open shape. Make your cuts at a 45-degree angle, about a quarter-inch above an outward-facing bud. This directs new growth outwards.
Don’t forget about “deadheading” throughout the season! This simply means snipping off spent blooms. Deadheading encourages the plant to put its energy into producing more flowers, rather than forming seeds. I carry a small pair of snips with me when I’m walking through the garden, just for this purpose. It really does make a difference in bloom production.
Battling Pests and Diseases: A Rose Grower’s Defense

Common rose pests include aphids, spider mites, and Japanese beetles. Aphids are tiny, soft-bodied insects that cluster on new growth and suck plant juices. Spider mites are almost invisible but leave behind fine webbing and speckled leaves. Japanese beetles, though beautiful, can decimate a bush quickly. For aphids and spider mites, a strong spray of water can knock them off, or you can use insecticidal soap. For Japanese beetles, hand-picking them off in the morning and dropping them into soapy water is often the most effective, chemical-free way to deal with them.
When it comes to diseases, black spot and powdery mildew are the most common culprits. Black spot shows up as dark spots on leaves, often turning them yellow and causing them to drop. Powdery mildew looks like a white, powdery coating on leaves and stems.
Here’s your defense:
- Good air circulation: Remember how we talked about pruning to open up the plant? This helps.
- Water properly: Water at the base, not the leaves, especially in the evening.
- Cleanliness: Promptly remove and discard any diseased leaves (don’t compost them!).
- Resistant varieties: Many modern roses are bred for disease resistance.
- Fungicides: If problems persist, organic or chemical fungicides can be used, following package directions.
Staying vigilant is key. A quick check of your roses every few days can help you spot problems before they get out of hand.
Winterizing Your Roses: Protecting Them from the Cold
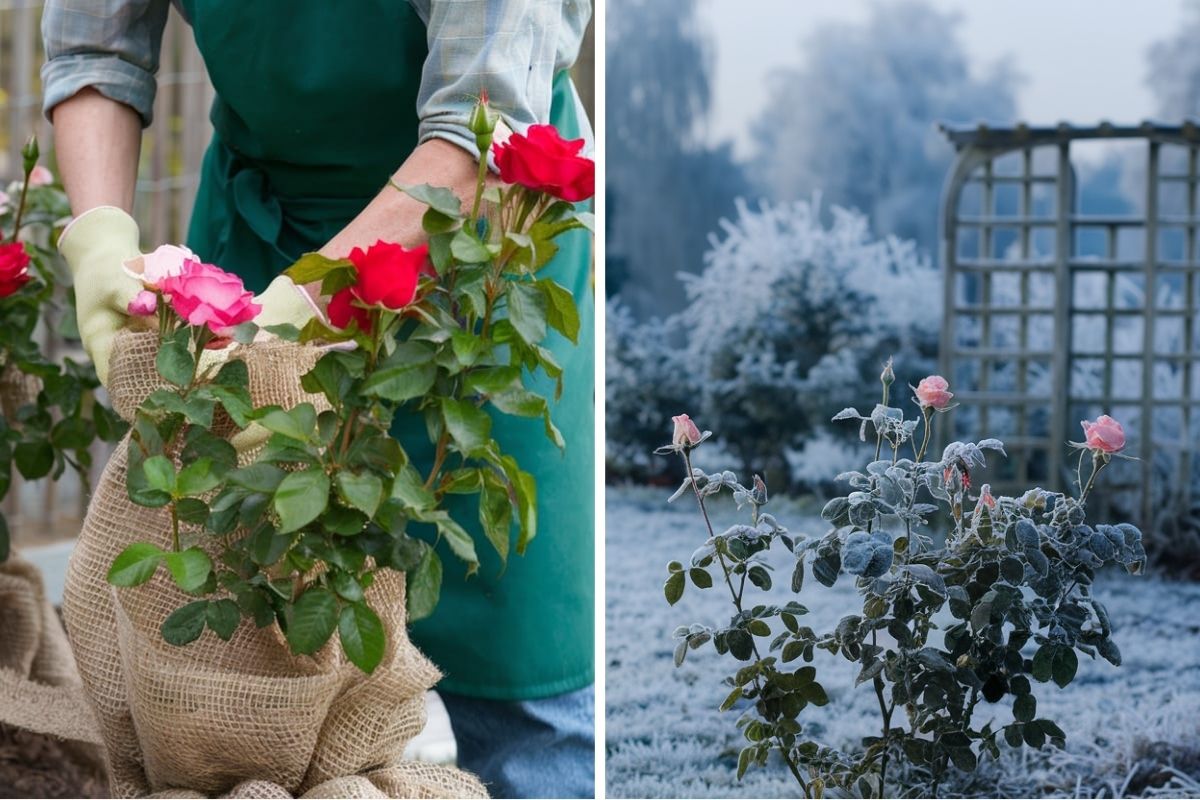
For those in colder zones, wait until after the first hard frost. This signals to the rose that it’s time to go dormant.
- Clean up: Remove any fallen leaves and debris around the base of the plant. This helps reduce places for diseases or pests to overwinter.
- Prune lightly: Trim back any exceptionally long canes that might whip around in winter winds. You don’t need to do your main pruning now.
- Mound up: Create a mound of soil, compost, or shredded leaves around the base of the plant, about 10-12 inches high. This protects the graft union from extreme cold.
- Add protection: In very cold areas, you can add a layer of straw or even a rose cone over the mound for extra insulation.
Come spring, when the danger of hard frost has passed, you can gently remove the protective layers and begin your regular spring routine. It’s like tucking them in for a long winter’s nap, knowing they’ll wake up refreshed and ready to bloom.
Enjoying the Fruits of Your Labor: What Comes Next
But the journey doesn’t end when the first bud opens. Continue to deadhead spent flowers to encourage more blooms. Keep up with your watering, feeding, and pest checks. A little ongoing attention goes a long way in keeping your roses looking their best all season long.
And don’t forget to cut some! Bring those beautiful blooms inside and arrange them in a vase. There’s an unmatched feeling of satisfaction in decorating your home with flowers you grew yourself. It’s a moment of quiet pride and pure pleasure.
So, are you ready to embrace the world of roses and add some undeniable beauty to your garden? Which rose variety are you most excited to try first?


Leave a Reply