Ever felt that itch to create something awesome with your own two hands? Something that screams ‘adventure’ and ‘horsepower,’ even if it’s just buzzing around the backyard? Well, if you’re like me, you’ve probably stared at a pile of metal and thought, “I could turn that into a go-kart.” It’s a fantastic project, a true test of your mechanical know-how, and honestly, incredibly rewarding. Building a go-kart from scratch isn’t just about putting parts together; it’s about learning, problem-solving, and eventually, feeling the wind rush past your face in a machine you built yourself. It might seem daunting at first, with all those moving parts, but I’m here to tell you it’s absolutely doable for anyone with a bit of patience and a willingness to learn.
Key Takeaways
Getting Started: Planning Your Go-Kart Build

Honestly, this is where most folks either succeed or get stuck. You’ve got an idea, maybe a picture in your head, but a solid plan makes all the difference. Before you even think about buying a piece of steel tubing or a 6.5 hp Predator engine, you need to map out your vision. What kind of go-kart are you building? Is it a small yard kart, a speed demon, or something in between? This decision impacts everything: size, power, and in the end, cost.
Think about who’s going to drive it. Is it for kids? Then safety and simplicity are key. Is it for you? Then maybe you’ll want a bit more grunt and a more sophisticated steering mechanism design. Sketch it out. Draw multiple angles. Look at existing go-kart plans online. This pre-work will save you headaches and wasted materials down the line. It’s like building a house – you wouldn’t just start nailing boards together, right?
A well-thought-out plan helps you identify the essential components and avoid costly mistakes later on.
Gathering Your Tools: The Core Items for Chassis Fabrication
Let’s be real, you’re going to need some serious equipment for this. This isn’t a project you can tackle with just a screwdriver and a wrench. When I built my first off-road kart, I definitely underestimated the need for proper cutting and shaping tools. I tried to get by with a hacksaw for too long, and let me tell you, that was a slow, muscle-aching lesson in patience.
Here’s a basic tools list for building a custom go-kart. You might already have some of these, but others are worth investing in or borrowing.
- Welder: For joining steel tubing. A MIG welder is commonly recommended for beginners.
- Angle Grinder: Very important for cutting metal, shaping, and grinding down welds.
- Drill & Drill Bits: For creating holes for bolts and fasteners.
- Measuring Tape & Square: Precision is your friend here.
- Clamps: To hold pieces securely while welding or drilling.
- Safety Gear: Welding helmet, gloves, safety glasses, ear protection, and sturdy footwear. Never skip this!
- Metal Saw (optional but helpful): For cleaner, straighter cuts than an angle grinder.
If the idea of welding makes you nervous, don’t worry. There are some excellent DIY go-kart plans for beginners that often rely on bolt-together sections for a simple go-kart chassis design without welding. It might not be as robust as a welded frame, but it’s a great starting point for backyard go-kart construction.
Sourcing Your Go-Kart Parts: What You’ll Need
Okay, so you’ve got your plan and your tools. Now for the fun part: finding all the bits and bobs that will bring your go-kart to life. One of the common questions I hear is, “What materials are needed to build a go kart?” The answer depends on your design, but there are core components every go-kart needs. You can often find where to buy cheap go kart parts online, on marketplaces, or even from old lawnmowers and mini bikes.
Here’s a quick overview of the main components:
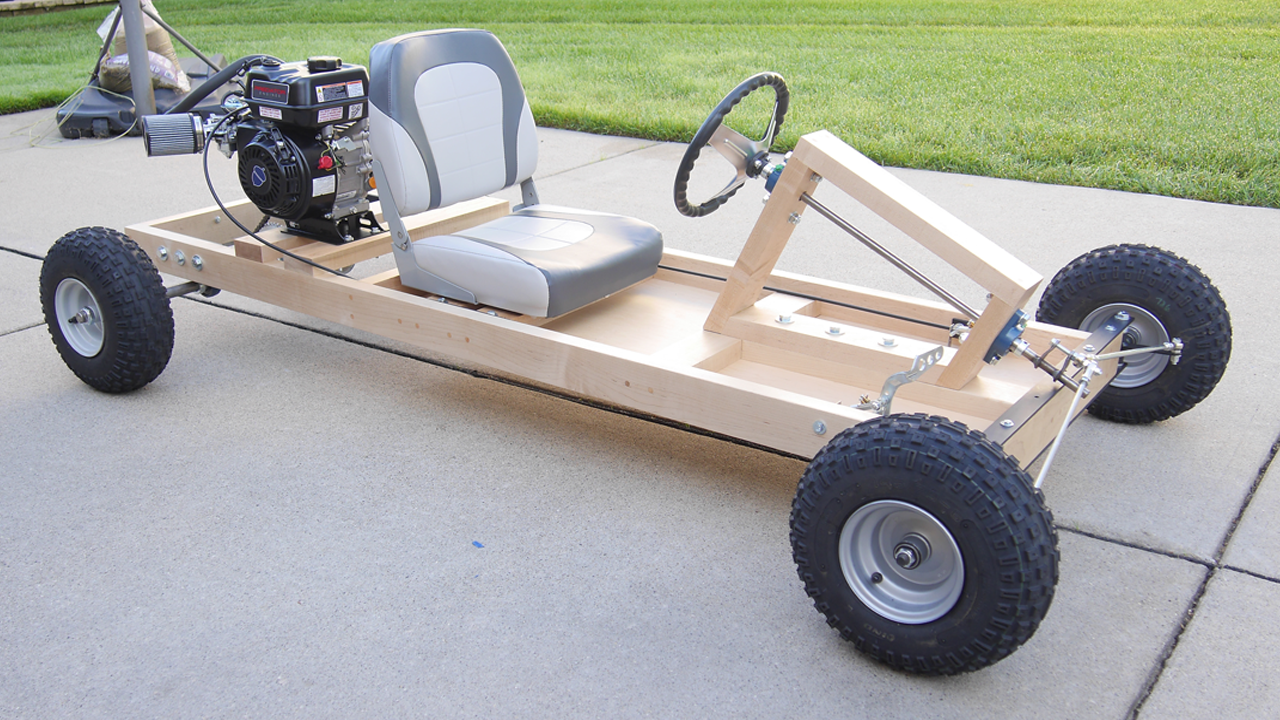
- Chassis Material: Typically 1″ or 1.25″ square or round steel tubing.
- Engine: A 6.5 hp Predator engine is a hugely popular choice due to its reliability and affordability.
- Clutch: A centrifugal clutch is usually paired with the engine.
- Axle: A live axle setup is common for better traction. You’ll need axle bearings too.
- Wheels & Tires: Pneumatic tires offer good grip and shock absorption.
- Brakes: Hydraulic disc brakes provide reliable stopping power.
- Steering Components: Steering wheel, steering shaft, steering knuckles, and tie rods.
- Sprockets & Chain: To transfer power from the clutch to the axle via a chain drive.
- Seat, Pedals, Fuel Tank: Comfort and control elements.
Pro Tip: Don’t be afraid to look for used parts or repurpose components from other small engines or equipment. Just make sure they’re in good, safe working order before you integrate them into your build. Sometimes, a little creativity can save you a lot of cash.
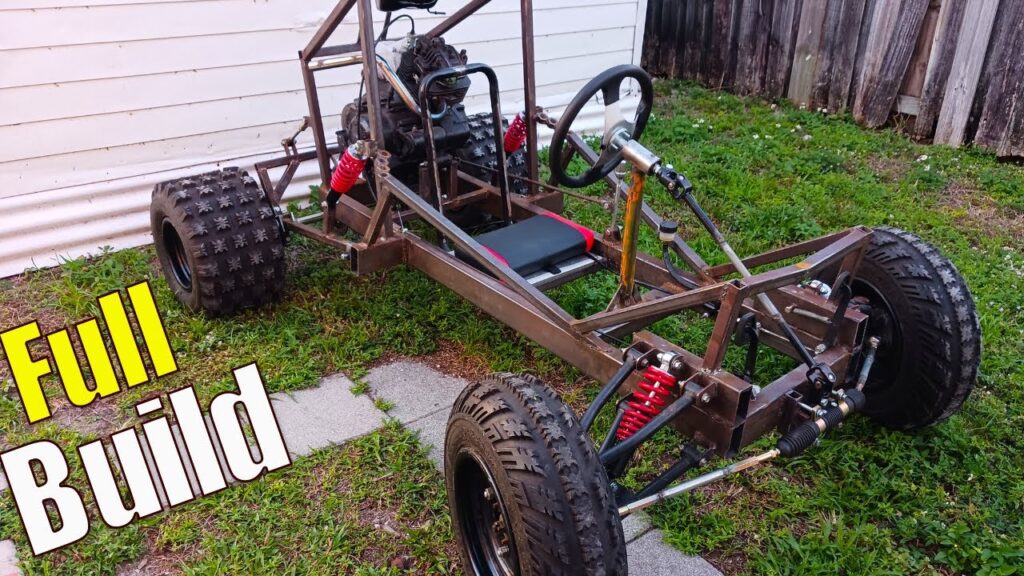
Chassis Fabrication: Building the Frame
This is truly the backbone of your go-kart. It’s where the metal meets the grinder (and hopefully, the welder!). Your chassis design will dictate the overall stability and feel of the kart. You’ll start by cutting your steel tubing according to your plans. Remember what I said about measuring twice? This is where it really counts. Even a small error here can throw off your entire alignment.
Once your pieces are cut, you’ll begin welding them together. If you’re new to welding, practice on some scrap pieces first. Get a feel for the arc and the puddle. You’re aiming for strong, consistent welds that can withstand bumps and vibrations. The first time I tried this, I made the mistake of rushing my welds, resulting in some weak spots that needed to be re-done. It added hours to the build, but it was an important lesson in patience and quality.
Take your time with chassis fabrication; a solid frame is non-negotiable for safety and performance.
After welding, you’ll want to grind down any sharp edges and prepare the frame for mounting the other components. This might seem like tedious work, but it really contributes to the finished look and feel of your homemade go-kart. Ensure all mounting points for the engine, axle, and steering components are strong and level.
Steering System Setup: Getting Direction Right

A go-kart isn’t much fun if it only goes straight! The steering system is pretty straightforward once you break it down. You’ll have a steering shaft that connects to your steering wheel. This shaft then connects to a steering column, which in turn links to your steering knuckles via tie rods. The steering knuckles are what the front wheels attach to, allowing them to pivot.
When you’re designing or building this, pay close attention to the geometry. The go kart steering mechanism design explained simply involves ensuring that when you turn the wheel, both front tires turn in unison and at the correct angles. Ackerman steering geometry is a term you might hear, and it simply means the inner wheel turns more sharply than the outer wheel during a turn, which reduces tire scrub. Don’t overcomplicate it for a basic build, but be aware that getting the tie rod lengths and pivot points right is important.
Mounting the steering column and ensuring smooth operation without too much play is key. You want responsive, predictable steering, not something loose and wobbly. Double-check all bolts and joints here; a loose steering component is a major safety hazard.
Powering Your Ride: Engine, Clutch, and Drive Train
This is where your go-kart really comes alive! Choosing the best engine for homemade go kart is a frequently discussed topic, but for most DIY enthusiasts, the 6.5 hp Predator engine from Harbor Freight is a runaway favorite. It’s powerful enough for most backyard fun, affordable, and readily available. The sound of that engine kicking over for the first time, a guttural rumble shaking the garage floor, is pure satisfaction.
You’ll connect the engine to a centrifugal clutch. This clutch automatically engages as the engine RPMs rise, meaning you don’t need a gearbox or a manual clutch pedal. It makes driving simple. From the clutch, a chain drive will connect to a larger sprocket mounted on your live axle. This combination of sprockets and chain dictates your gearing. A smaller engine sprocket and a larger axle sprocket give you more torque (better acceleration, lower top speed), while the opposite gives you more speed (slower acceleration).
Installing the engine, clutch, and chain drive involves precise alignment. Misalignment can cause the chain to jump off or wear out prematurely. Make sure the engine mount is secure and robust, capable of handling the vibrations and torque. You’ll also need to connect a throttle cable from your pedal to the engine’s carburetor, allowing you to control the speed.
The 6.5 hp Predator engine from Harbor Freight is a runaway favorite for most DIY enthusiasts.
Braking System: Safety First, Always
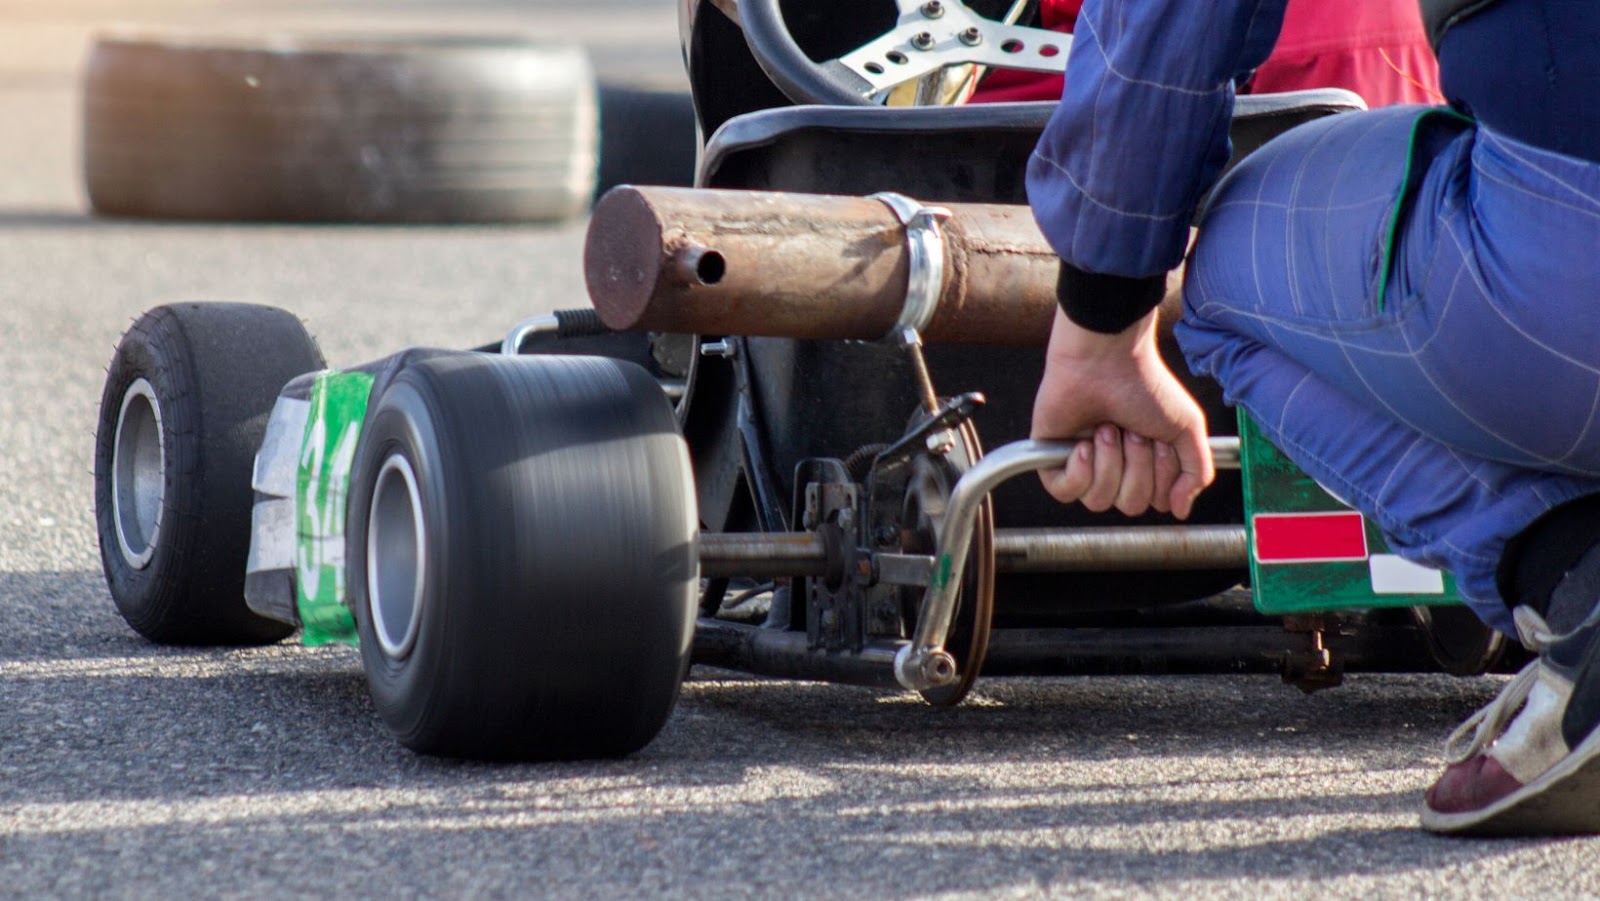
You’ve got to be able to stop what you build. Seriously, this isn’t optional. For me, safety precautions for homemade go karts always start with a reliable braking system. While some simple builds might use a band brake, I wholeheartedly recommend hydraulic disc brakes. They offer far superior stopping power and consistency, which is absolutely necessary when you’re hurtling around.
How to install go kart brakes at home involves mounting a brake caliper and disc (rotor) onto your live axle. The caliper is connected by a hydraulic line to a master cylinder, which is activated by your brake pedal. When you press the pedal, fluid pressure applies the caliper to the disc, bringing your kart to a halt. Make sure all connections are tight and that you bleed the brake system properly to remove any air bubbles, which can cause spongy brakes.
Always test your brakes thoroughly in a safe, open area before letting anyone really ride the go-kart. This isn’t just a suggestion; it’s a non-negotiable part of the build. A few extra minutes here could prevent a serious accident. A working brake system is your primary line of defense against unforeseen bumps and turns.
The Finishing Touches: Seats, Pedals, and Paint

Once all the mechanical bits are in place and working, it’s time to make your go-kart comfortable and visually appealing. A comfortable seat makes a huge difference, especially if you plan on spending more than a few minutes driving. You can buy purpose-built go-kart seats or repurpose a bucket seat from an old car or even a sturdy plastic chair, as long as it’s securely mounted.
The pedals for throttle and brake need to be positioned comfortably for the driver. Think about adjustability if multiple people will be using the kart. Welding small tabs for the pedals and ensuring they have a smooth, unobstructed range of motion is very important. Connect your throttle and brake cables, making sure they don’t snag on anything.
And then there’s the paint! This is where your personality shines through. Clean the frame thoroughly, prime it, and then apply your chosen color. The funny thing is, while paint doesn’t make it go faster, it sure makes it feel faster. Adding some grip tape to the floorboard and maybe a small fender can add both function and flair to your backyard go-kart construction.
Safety Precautions for Homemade Go-Karts
We’ve touched on brakes, but let’s go over safety again because it’s that important. Building something with an engine and wheels comes with responsibilities. Beyond the build itself, always wear a helmet, sturdy shoes, and appropriate clothing. Don’t drive on public roads unless you know the legal requirements for homemade go karts in your area (which are usually quite restrictive).
Regular maintenance is also a huge part of safety. Check tire pressure, brake fluid levels, chain tension, and all nuts and bolts before each ride. Vibrations can loosen things up over time, and you don’t want a wheel coming off mid-turn. Keep a fire extinguisher handy, especially during initial engine tests.
Here’s a simple table to keep your go-kart safe and sound:
| Component | Check Frequency | Safety Point |
|---|---|---|
| Brakes | Before every ride | Ensure firm pedal feel, no fluid leaks, adequate stopping power. |
| Tires | Before every ride | Check pressure and tread wear. |
| Chain & Sprockets | Every 5-10 hours of use | Proper tension, no excessive wear, clean and lubricated. |
| Steering Linkage | Every 5-10 hours of use | No excessive play, all bolts tight. |
| Engine Mounts | Periodically | Ensure all bolts are secure and free from cracks. |
| All Nuts & Bolts | Periodically | Visually inspect and tighten as needed. |
Remember, a homemade go-kart is a powerful machine. Treat it with respect, and it’ll provide hours of fun. Neglect safety, and you’re asking for trouble.
Frequently Asked Questions
Q: How much does it cost to build a go kart from scratch?
A: The cost can really vary. For a basic, functional go-kart, you might spend anywhere from $500 to $1500, especially if you’re good at finding used parts. If you buy everything new and go for higher-performance components, it could easily be over $2000. It really depends on your choices for the engine, frame materials, and accessories.
Q: How long does it take to build a DIY go kart?
A: This is highly variable based on your skill level, tools, and how much time you can dedicate. A simple go-kart might take a dedicated person a few weekends (20-40 hours), while a more complex design could stretch into several months of weekend work. Don’t rush it; enjoy the process!
Q: Can I build a go kart without welding?
A: Yes, absolutely! While welding makes for a stronger and often lighter frame, you can build a sturdy go-kart using bolt-together construction. This often involves using angle iron or pre-fabricated steel sections that are drilled and bolted together. There are plenty of simple go-kart chassis design options without welding available online.
Q: What’s the best engine for a homemade go-kart?
A: For beginners and most backyard builds, the 6.5 hp Predator engine from Harbor Freight is widely considered the best choice. It offers a great balance of power, cost, reliability, and easy availability of parts. Larger engines are possible, but they add complexity and cost to the build.
Q: Are homemade go-karts legal to drive on public roads?
A: Almost universally, no. Homemade go-karts lack the necessary safety features, lights, and registration to be street-legal in most jurisdictions. They are generally restricted to private property, off-road tracks, or designated go-kart circuits. Always check your local laws regarding vehicle operation.
See? Building a go-kart from scratch isn’t just a fantasy; it’s a tangible project that you can totally conquer with the right approach and a bit of elbow grease. It’s a journey that teaches you a ton, from mechanics to perseverance. So, what are you waiting for? Grab your plans, gather your tools, and let’s get building. What’s the first thing you’re excited to customize on your new ride?


Leave a Reply